|
Follow these steps to begin submitting an article using SliQ
Article Submitter:-
1. Complete the Author Account
details
See Entering Author Account
Details for more information.
2. Write an Article
See Writing an Article for more
information.
3. Enter login details for your
Captcha Decoder Provider
See Configuring a Captcha
Decoder Provider for more information.
4. Perform Registrations and
Sign Up as an Author
To register or sign up as an
author with the article directories, click the Sign Up button in the toolbar:

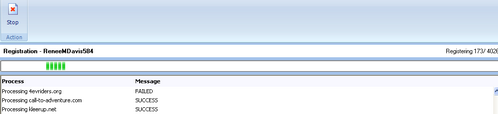
If you have entered all
information correctly, SliQ will then open its Progress tab and
perform registrations. While registrations are being processed you
will see a progress indication on screen:
Wait until the progress indication stops and SliQ indicates
that registrations are complete. Depending on the number of
directories to register with, registrations may take some time. If
you want, you can press the Stop button in the toolbar and come
back to perform more registrations later.
5. Perform
Confirmations
After registering as an author
in step 4, you need to click any confirmation links in the emails
sent to you by the article directories. You will also need to copy
any login details emailed to you by the directories so that SliQ
can log in when it comes to submit your article in step 6
below.
If you have entered email
server and account details as described in step 1, SliQ can
automatically click confirmation links and copy login details from
emails for you.
To make SliQ perform the
confirmation process, click the Confirm button in the toolbar:

SliQ will then open its
Progress tab and perform confirmation. Wait until the confirmation
process is complete. If you can't wait, press the Stop button in the toolbar and come
back to perform more confirmations later.
6. Perform
Submissions
After performing confirmations, if
you have written your article as described in step 2, you can begin
submission by clicking the Submit button in the toolbar:

SliQ will then open its
Progress tab and perform article submissions. Wait until the
submission process is complete. If you want to stop submissions and
continue later, press the Stop button in the toolbar.
7. Finding out if your articles
have been published
While submitting, SliQ will
attempt to find out if your article has been published instantly.
If the article can be found, SliQ will record the URL and show it
in the main directory list:
See Also
|